

Sunday, May 20, 2018
Wednesday, January 4, 2017

Saturday, September 17, 2016
Review: Alps Mountaineering Tasmanian 3
 |
| When it's 22 degrees outside, this is bullshit. |
Price (with footprint) delivered to my door: $261.89
Why price with footprint and delivery? Because that's the real world price.
Retailer: REI
You can also find this tent at Amazon and other online retailers.
Intended Use:
Bicycle camping
Car and Motorcycle camping
Hunting
Backpacking
Roomy, lots of space even for my 6'2" frame
Heavy duty materials
Quality construction
Lots of pockets
Large vestibule
Cons:
Weight
Difficult to pitch and pack rain fly
Poorly designed poles
Conclusions:
I really wanted to love this tent. It was my first 4 season tent and I was excited to try it out in cold weather.
I appreciated the length and width of this tent and it's robust construction. It seems to be very well built. I also learned that the four season designation mostly means tougher materials and better ventilation controls. Although the heavier weight was a concern, using a BOB Ibex or a motorized ovehicle to haul gear negated this factor.
Sadly, after two nights of camping at 9400' in Colorado during September, I'm returning it. Here's why: The pole tips are badly designed. They easily pull out, both in-sleeve and while fastened to the footprint/tent. This makes it difficult to install or remove the poles into the rain fly sleeves.
In the comfort of my living room - no big deal. When it's 22 degrees and you're struggling to keep your fingers from going numb, it sucks. Big time. Stopping to pull your gloves off to re-insert the pole tips for the 5th or 6th time is annoying. It's also aggravating when the poles get stuck in the too tight rain fly sleeves.
Did I mention it was 22 degrees outside? Not fun. Especially when you're trying to get camp packed and rolling quickly so you can get back to town for a client meeting.
Hey Alps! Are you reading this? I wanted to love your tent. You need to redesign the rain fly and pole tips. This would have been a high quality purchase otherwise. At the price, you'll find it hard to find a better deal on a large four season tent.
About the author: I'm an avid outdoor enthusiast and have spent countless nights in tents in the wilderness. I hike, ski, ride mountain bikes and motorcycles, run, and love all things outdoors. Unlike many of the other reviews you'll read online, I didn't receive any compensation or freebies for this review, sadly. I make my living helping people make smarter real estate decisions.
If you found this article or review helpful, support this site via the button below.
Thursday, September 8, 2016
Wheel Size: A Study in Contrasts
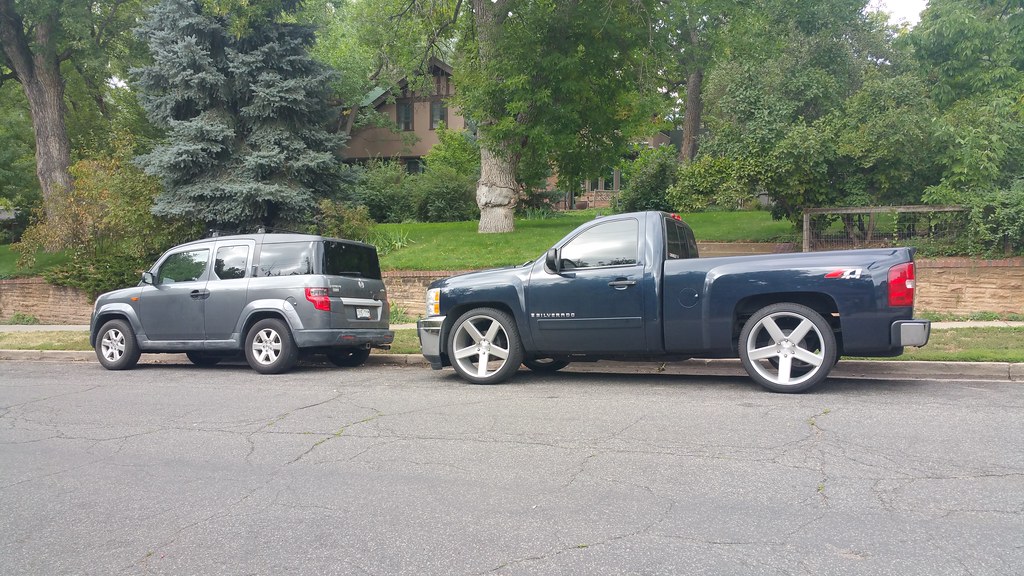
It boggles the mind.
Why do bros do this? They take a perfectly useful pick-up and spend thousands of dollars to make it far less useful: slammed suspension, gigantic damage-prone wheels with low profile tires. Maybe I'm getting old, but I don't get it. It's like taking a NFL player and forcing him into pimp shoes and a zoot suit and then asking him to take the field.
I'll take the Honda Element, thanks.
Monday, August 1, 2016
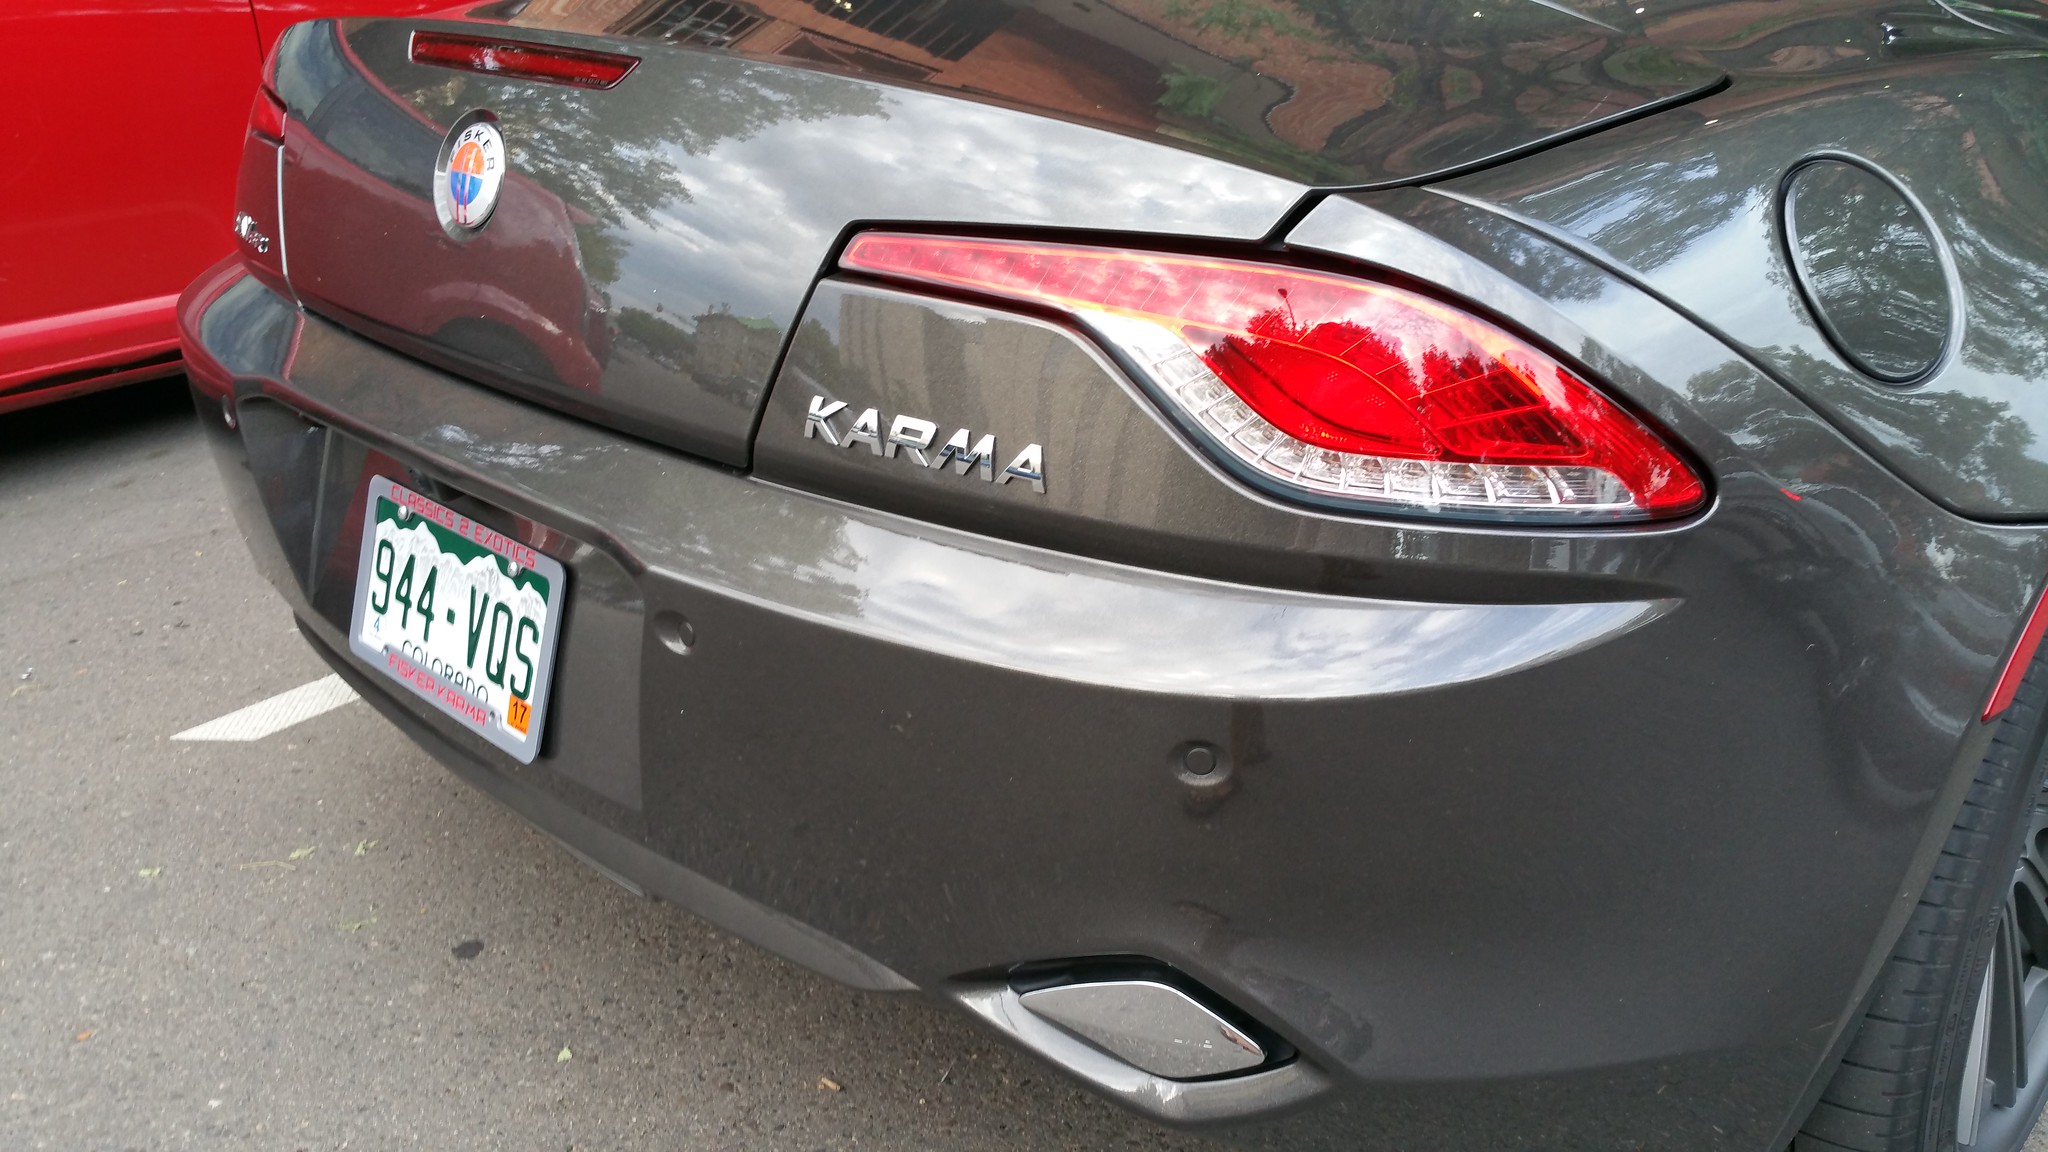
Fisker Karma - It's Back?
GT spotted a gorgeous Fisker Karma in downtown Boulder this evening.
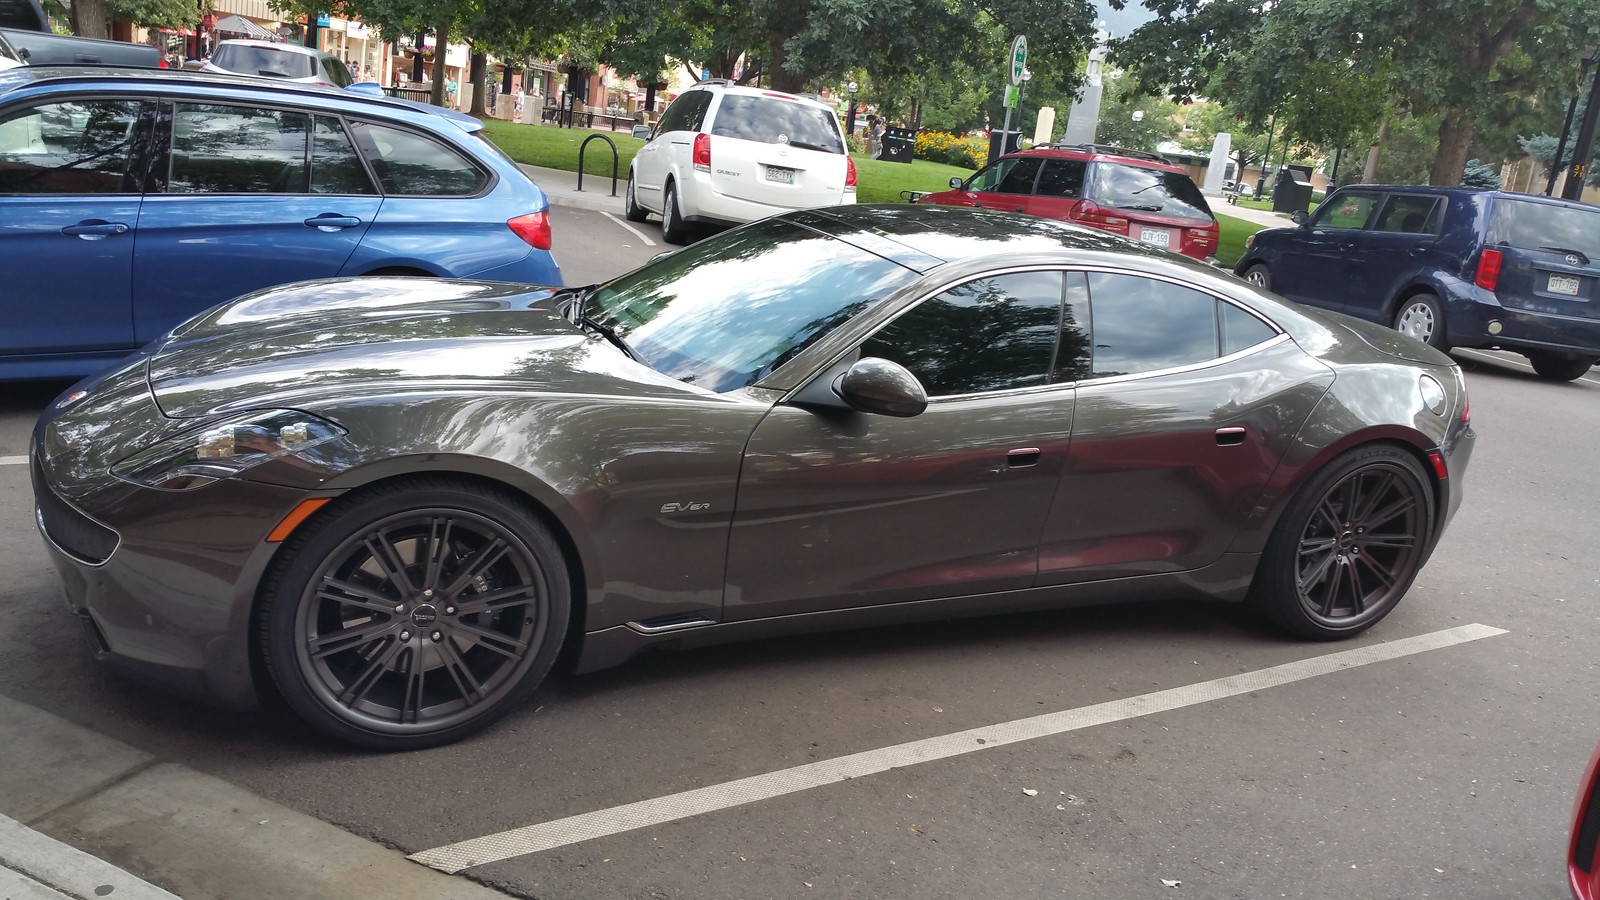
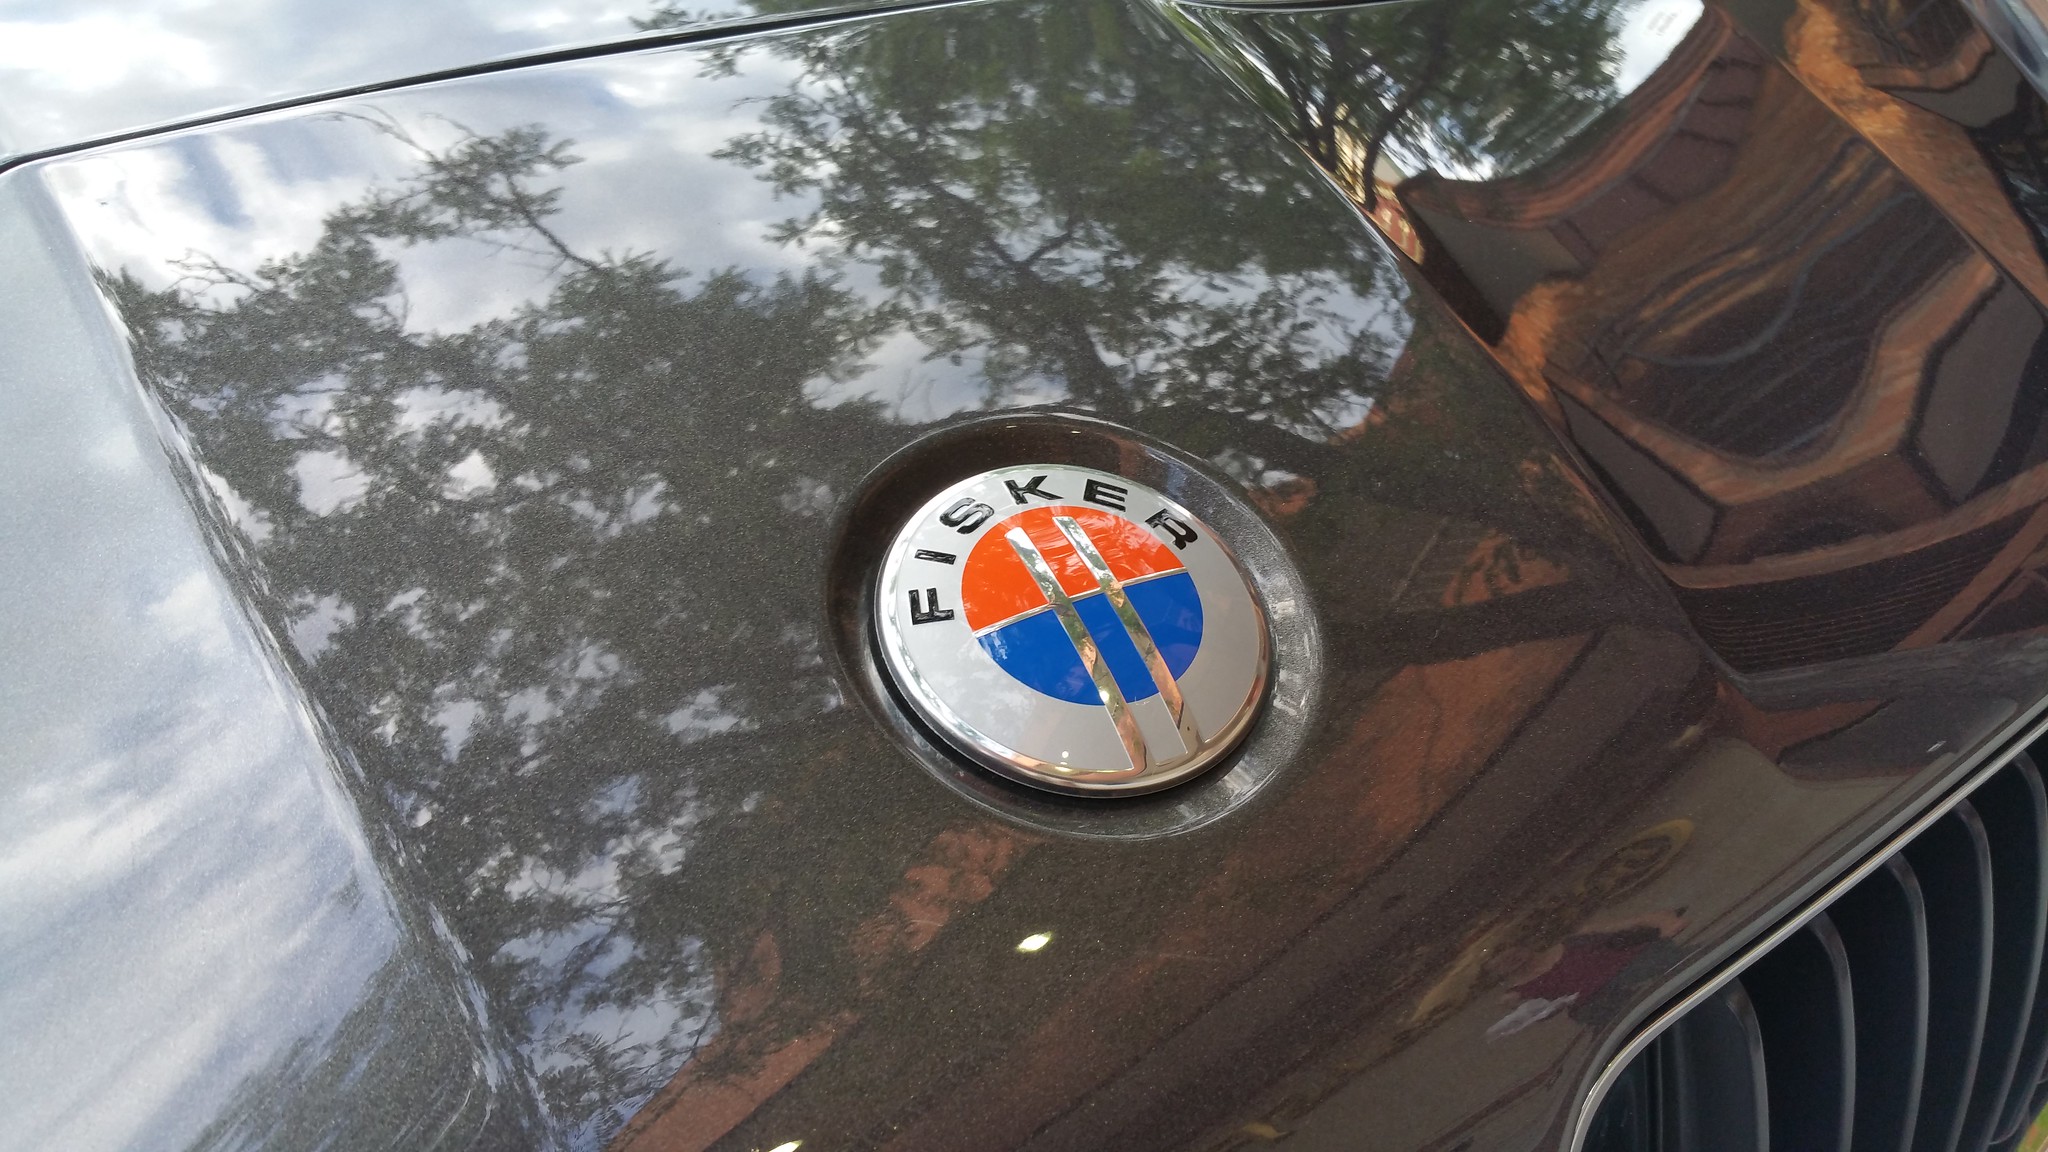
Only 2400 or so of these were produced, making it a very rare vehicle. The company description: "Karma’s vision is to inspire. To offer timeless design with technology that creates an ecologically sensitive product; so distinct that it forms an emotional connection between buyer and brand."
According to Car and Driver, "the Fisker Karma is the lewdest wedge of car porn to hit the pavement since the onset of the 5-mph bumper. From one 22-inch wheel to the other, the Fisker is a heartthrob, a design spectacularly unchained from the shackles of practicality and brand identity that enslave other automakers. It is an auto-show concept car before it has been horsewhipped into bland banality by the finance, marketing, and engineering departments. It is a car built by a company started by a designer."
After the company failed to repay $192MM in loans from the DOE, the company's assets were seized and the automaker declared bankruptcy. it's assets were later acquired by Chinese investors and supposedly the vehicle will be reintroduced. We're not sure if this is a new 2016 or an older model, but it remains a rolling work of art.
Thursday, July 21, 2016
Size Matters : Dollar Shave Club vs. Gillette

A few months ago, I decided to try Dollar Shave Club. What can I say? The relentless advertising got to me. Plus, I was on my last Mach3 blade after blowing through another supply from Costco.
One late night, after a few pints of beer, I clicked over to the Dollar Shave Club website and signed up for an order.
First - I don't normally review hygiene or beauty products at GearThoughts. I'm much too busy with my day job. But the DSC experience, and subsequent let down, is worth sharing.
You should also know that I don't just shave my face. I usually have a beard, so I shave a portion of my face. I also regularly shave my entire head.
The Cartridges
The next cartridge I tried was a step down, the DSC 4X. It costs $6 for 4 cartridges, or $1.50/cartridge. The 4x refers to 4 stainless steel blades. It's marketed as DSC's mid-level product.
I compared the DSC Executive and 4X against my old Mach3 blade, pictured above (at least a month old). At a recent trip to Costco, I paid $32.99 for 14 cartridges, or $2.36 per cartridge before tax - the most expensive of the three cartridges reviewed in this article.
Note: I did not order or test the DSC Humble Twin, the entry level cartridge. I also did not test the uber expensive Gillette Fusion ProGlide.


Forget about the number of stainless steel blades. Size matters more.
All cartridges shaved about the same on a relatively flat surface but the experience was very different when it came to tight areas such as beneath the nose or next to the ear. Maneuverability is your friend. The smaller the cartridge, the more easily you can shave hard to reach places.

Gillette's cartridge is 31% smaller in height (top to bottom measurement) than the DSC Executive and 17% smaller than the DSC 4X. It is far more agile. This is a critical difference.
After struggling with both DSC razors for some time, I gave up on shaving the tiny nook above my ear with either DSC product and resorted to using my month old Mach3 to finish the job. The DSC cartridges are too wide.
Ease of rinsing was the 2nd biggest factor when it came to shaving performance. Because the blades are so narrowly spaced in the DSC cartridges, hair would frequently jam between the blades. This happened routinely with the DSC 4X and completely clogged the even tighter spaced blades on the DSC Executive. To keep clear the hair, I needed to run my thumb against the cartridge (downward motion) under running water to dislodge the stuck whiskers. On the Gillette March3, rising the blade under water alone was enough to dislodge all hair from the blade surface.
It gets old to need to run your thumb down the blades with each and every swipe, dramatically slowing how quickly you can shave. Look carefully at the photo above and you'll see hair still stuck between the blades of the DSC cartridges. Even a finger rubdown doesn't easily dislodge hair stuck between the blades.
Conclusions
You'll save only about $20 a year if you switch to the DSC 4X. It offers a similar shave quality to the Mach3 and you'll also get stuff in the mail, sometimes including a free sample of shave cream or lotions. That's kind of cool, but it doesn't make up for the poor rinsing performance and the difficulty in reaching hard to shave areas. For the $20, I'll gladly spend less time getting ready in the morning.
The bottom line of this two month experiment? Unless you enjoy primping in the bathroom, stick with the Gillette Mach3. Despite being a decades old product, it still shaves cleanly, rinses cleanly, and the cartridges last a surprisingly long time. If you want to extend the life of the cartridge, rinse the blades in alcohol when you're done shaving. It's the evaporation of the water that dulls the blades faster, not your whiskers.
As for the DSC Executive, I recommend you skip it entirely. It offered no better shave than the 4X. In fact, it was actually worse because of the huge size and tightly packed blades on the cartridge.
Note: Unlike many other product reviews you'll find online, I did not receive any free samples or products from either Dollar Shave Club or Gillette. This is not a paid endorsement or paid review. If you liked this article, feel free to donate via the button below.
Monday, June 13, 2016

Subscribe to:
Posts (Atom)